Use this step-by-step guide to learn how to set up Samba to create file and printer sharing to SMB/CIFS clients from a Linux server.
Samba is an incredibly powerful tool that allows you to create seamless file and printer sharing to SMB/CIFS clients from a Linux server or desktop. With Samba, you can even connect a Linux machine to a Windows Domain. But before you can tackle the more challenging aspects of Samba, you first must have it up and running.
We’re not going to deal with Windows Domain controllers yet; instead, we’ll focus on the much simpler task of joining a Windows workgroup and sharing folders to all clients on that workgroup.
Jump to:
You don’t need much to get Samba up and running:
I’ll demonstrate this on Ubuntu Desktop 23.04, but the process works the same on most Linux distributions. First, we’ll create a folder that will allow anonymous sharing across your workgroup and then create a password-protected share.
Note: You should alter the instructions according to your distribution of choice.
sudo apt-get install -y sambasudo systemctl status smbd to check if the Samba service is started and enabled, so it will start on boot (Figure A).Figure A
sudo systemctl start smbd to start it.sudo systemctl enable smbd to enable it.That’s it — Samba will install and start.
The main configuration file for Samba is /etc/samba/smb.conf. Many will advise you to back up that file and create a new file with specific contents. However, I suggest using this file, as it is better tuned for the release of Samba you’ve installed.
SEE: Discover TechRepublic Premium’s web server configuration and management policy.
To that end, make a copy of the default configuration file, so you can safely edit the original and always have a working copy to fall back on. To back up the configuration file:
sudo cp -pf /etc/samba/smb.conf /etc/samba/smb.conf.bakworkgroup = WORKGROUPThe next section you need to edit is way down in the Share Definitions.
Before you configure anything with Samba, you will need to create a directory on your Linux server that you will want to share. For this example, we will use /srv/samba. To create this directory:
sudo mkdir /srv/sambasudo chmod a+rwx /srv/samba[Anonymous]
path = /srv/samba
browseable = yes
writable = yes
read only = no
guest ok = yes
sudo systemctl restart smbdYou should be able to reach those shares from any machine on your network.
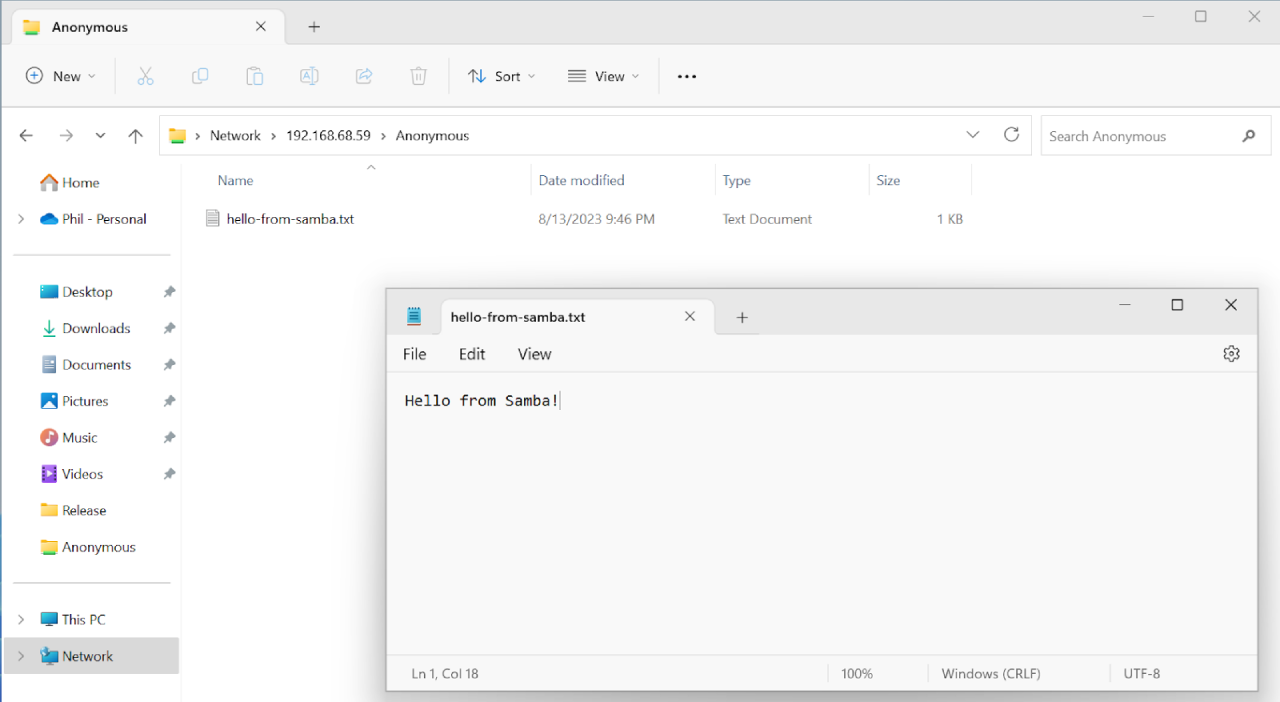
Since we set that share as anonymous, users won’t have to log in to access the files and folders within. To test this, you will need the IP address of your Linux server. You can get this via the ip a command:
Figure B

Figure C

/smb/samba directory (Figure D).Figure D

We’ve just added an anonymous share that anyone could access. If you want to add a folder (we’ll use /samba/shares as an example) that is password protected, follow these steps:
sudo addgroup smbgrp.sudo useradd shares -G smbgrp.sudo smbpasswd -a shares.sudo mkdir -p /srv/samba-secured.sudo chmod -R 0770 /srv/samba-secured.sudo chown root:smbgrp /srv/samba-secured.[SECURED]
path = /srv/samba-secured
valid users = @smbgrp
browseable = yes
writable = yes
read only = no
sudo service smbd restart.You now have a password-protected Samba share ready to use. Anyone that needs access to the share will log in with username shares and the password you set when you issued the command sudo smbpasswd -a shares.
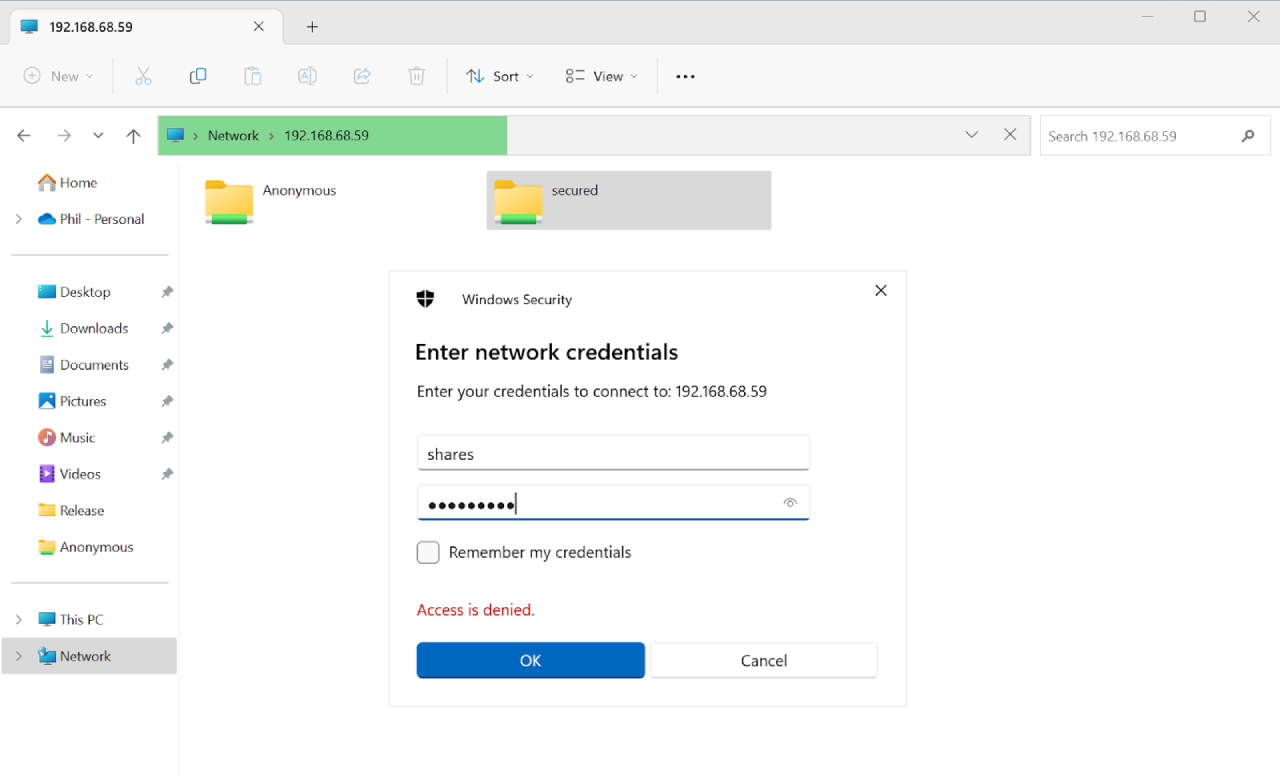
In Windows, you will be prompted to enter the credentials you created above (Figure E). Once you do, you will have access to the folder.
Figure E

One important note is that if you connected to the anonymous share above, Windows may not let you log in to the secured share. To remedy that, reboot the Windows computer, and try again.
One of the great things about Samba is it allows you to bend it to fit your needs. You can create as many shares as you want (password protected or not), share out printers and even join Windows Domains. This is just the beginning when it comes to using Samba. Follow our guides to learn how to:
Keep in mind that Samba is one of many ways to share resources between Linux and Windows. If you find this to be overkill for your needs, you may want to consider the more traditional file-sharing approach that makes use of SSH and SFTP on the Linux side and FileZilla on the Windows side.