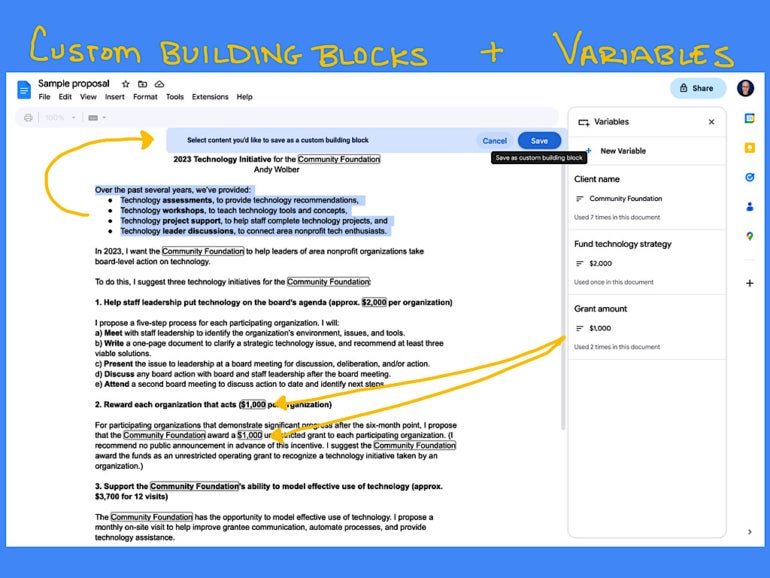
Custom building blocks and variables give many Google Workspace customers new ways to quickly reuse content and ensure content consistency, respectively. As of June 2023, custom building blocks and access to variables are available only to people who use Google Workspace Business Standard or Plus, Enterprise Standard or Plus, Education Plus or Nonprofit editions. Additionally, custom building blocks may be created and inserted from Google Docs on the web, not from the Google Docs mobile apps.
Jump to:
The custom building block lets you select any section of a Google Doc and save it for rapid insertion later into any Google Doc. You might use a custom building block for all sorts of standardized content such as an organization overview, project or product descriptions or personal biography paragraphs of varying lengths. A custom building block also can be used for standard project checklists, procedures or recommendations.
Anywhere you frequently used to copy-and-paste a section of text could be a candidate for a custom building block.
The variables system helps ensure the consistency of content within a Google Doc. Once created and inserted into a document, variable content displays the same everywhere within the file. You might use a variable for a client name, contact data or for things such as the proposed quantity or amount.
The benefit of using a variable is that you enter the content once, and it is updated throughout the document, which makes variables especially useful for things such as proposals and contracts.
In order to create a new custom building block, you must have document access permissions that allow you to copy document content.
Figure A
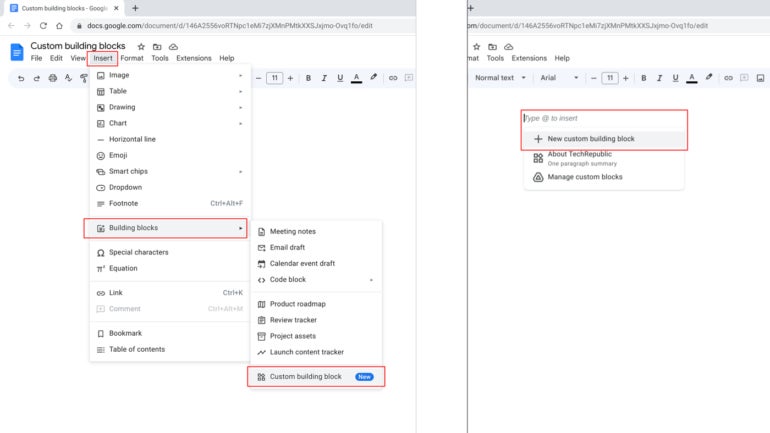
A prompt will display near the top of your document that indicates Select Content You’d Like To Save As A Custom Building Block, along with a Cancel and Save button.
3. Select your content. If you wish, include paragraph returns in your selection to ensure space either before or after your building block. Once selected, click the Save button (Figure B).
Figure B
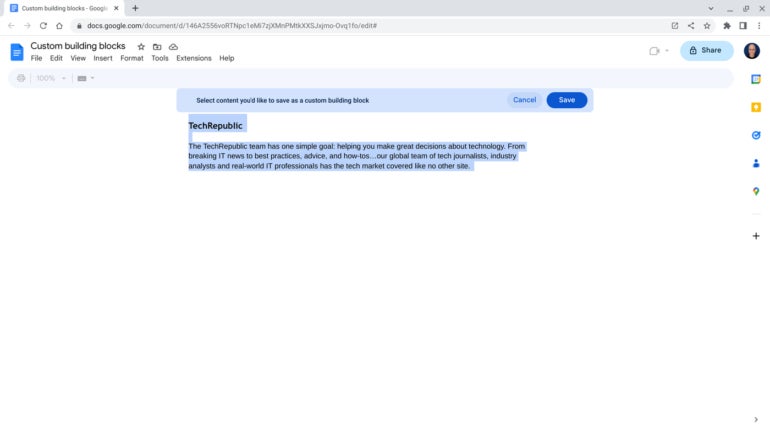
4. Enter the Name for your custom building block (Figure C). Later, the name will display in the building block section of the @ menu, so make it something relevant and memorable.
5. Optionally, you may also enter a Description (Figure C), which will display below the name of your custom building block in the @ menu.
Figure C
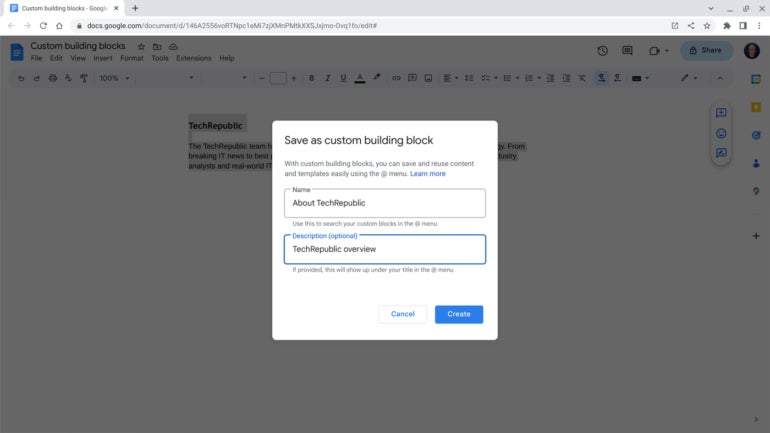
6. When finished, select Create to save your new custom building block. (Alternatively, choose Cancel to end the process without saving your selection.) The system adds your custom building block as a Google Doc in a folder titled Custom Building Blocks (auto-generated) on Google Drive.
To insert a previously created custom building block, do one of the following two options:
Select the name of your custom building block (Figure D) to add it to your document.
Figure D
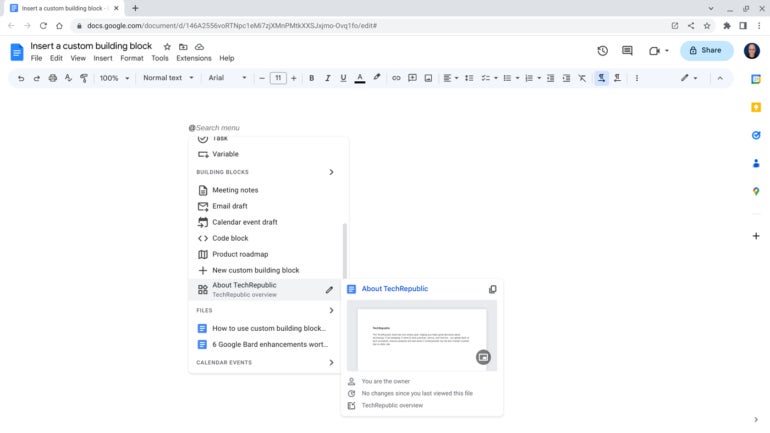
Since each custom building block content is stored as a Google Doc, you may edit the stored file. Once modified, the changes will display for all future insertions of the custom building block.
1. In a browser, go to Google Drive.
2. Navigate to the Custom Building Blocks (auto-generated) folder (Figure E on the left). This should display all previously saved custom building block content in Google Docs files. Open the file you wish to edit.
Figure E
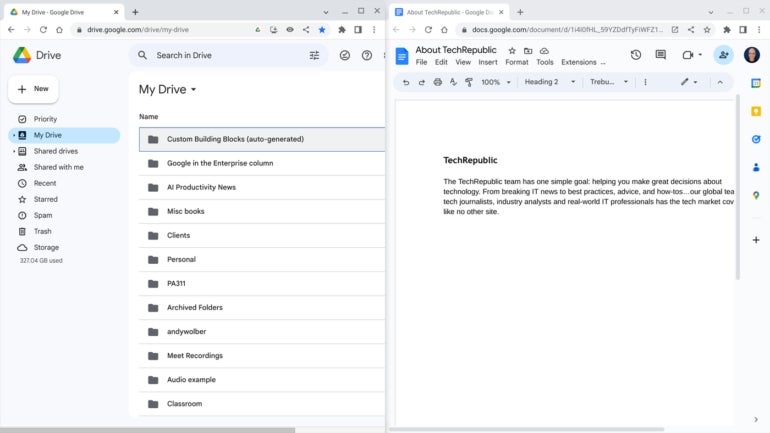
3. Modify the content as desired. For example, a brief company description paragraph is shown on the right in Figure E. (Note: If you change the name of a Google Doc in the custom building block folder, the new name should be reflected in the @ menu building block list.) The most current content will be used for subsequent @ menu custom building block insertions.
If you move a source custom building block Doc to the trash, that removes the corresponding item from the @ menu of insertable content options.
You may use a variable chip to ensure consistent content within a Google Doc. Once created, insert the variable wherever you want that particular piece of content to appear. You might use a variable for a name, contact information, a date or any sort of number.
For example, variables could be useful in a proposal for fields such as the client name, cost or start/end dates. By entering this information as a variable, you could adjust the total amount requested or a start/end date in the document simply by changing the variable. The use of a variable eliminates the need to meticulously find and replace data when updating or modifying a data element throughout a document.
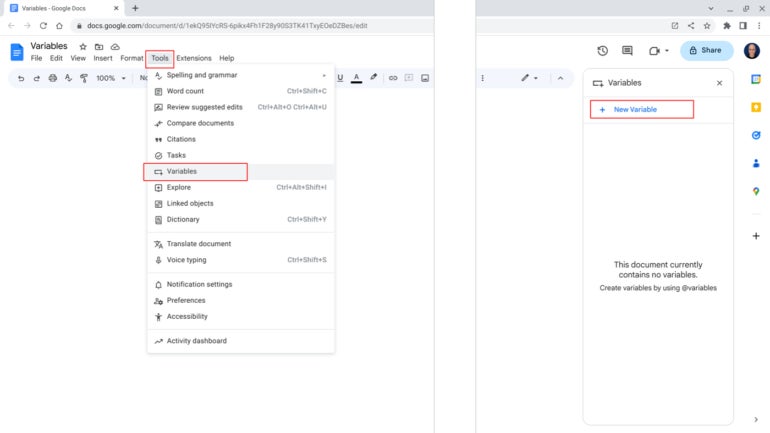
1. The simplest way to create a new variable is to Select Tools | Variables to display the Variables side panel and then choose + New Variable (Figure F).
Figure F
2. Enter the Name for your variable (Figure G). The name will display in the smart chip variable section of the @ menu, so make it something relevant and memorable.
Figure G
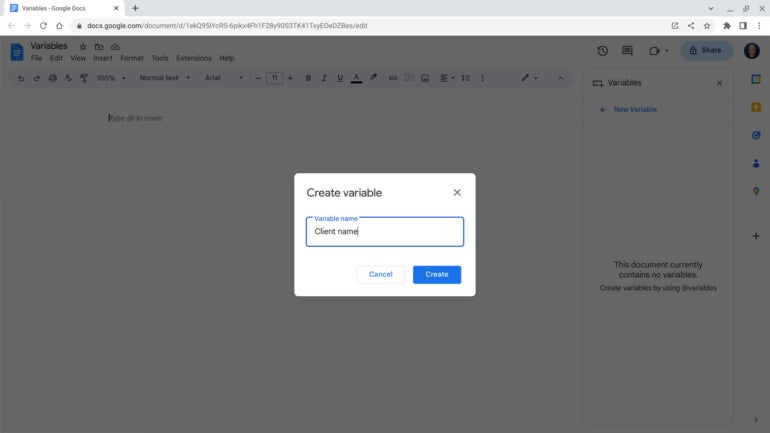
3. Select Create (Figure G). The variable now displays in the Variables side panel.
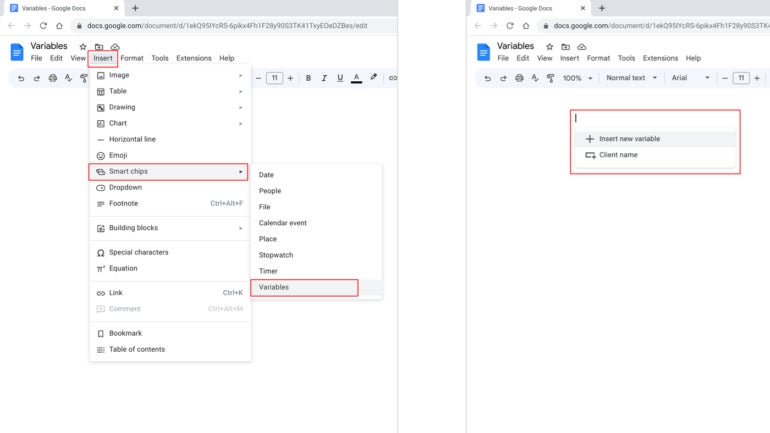
You may choose any of at least three ways to insert and configure a variable in a Google Doc:
The first two methods let you create a new variable with the +Insert New Variable option (Figure H, right).
Figure H
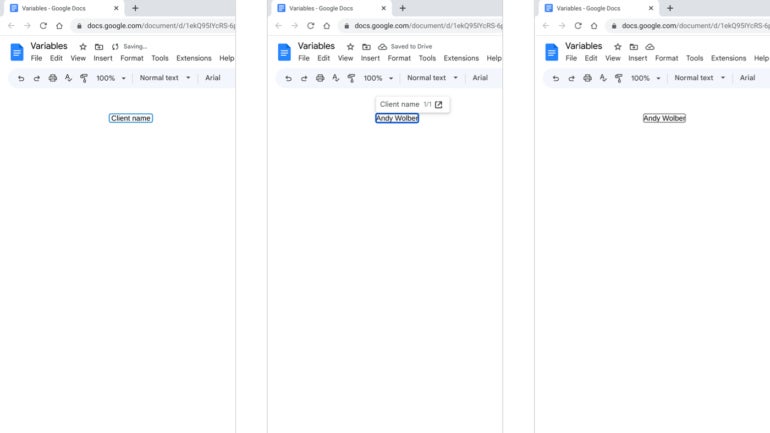
The variable initially displays as the variable name surrounded by a blue line. Place your cursor anywhere in the variable name and enter the value for the variable (e.g., a name or number, etc.). The color of the surrounding line changes to a gray color after you enter a value for a variable.
Place your cursor in any inserted variable in your document and modify the contents as desired, as shown in the sequence in Figure I. The changes you make to a variable value will automatically be reflected everywhere the variable displays in your document.
Figure I
While your cursor is in a variable, you may select the up or down options to navigate to either Go to Previous Instance or Go to Next Instance.
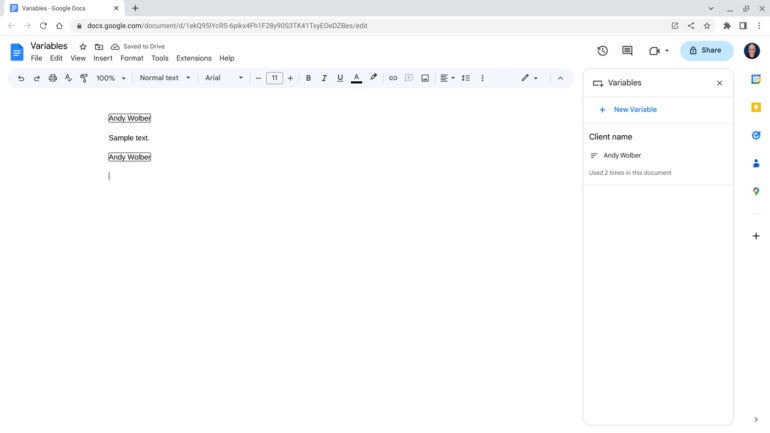
To display all variables, as well as the number of times each variable is used in a document, use the Tools | Variables option to activate the Variables side panel (Figure J).
Figure J
Mention or message me on Mastodon (@awolber) to let me know how you use custom building blocks and variables in Google Docs.